This is one of those Saturday afternoon projects that turned out much better than even I imagined.
I was needing a docking cradle for my iPod touch, but two things bothered me about buying one. First, I didn’t want to spend the money. But I also didn’t want to bring another piece of plastic gadgetry into the house if I could avoid it.
It occurred to me my iPod touch 2G came in an attractive jewel case. Perhaps there’d be some way to convert it into a docking cradle. Sure enough, there was a way and the results were jaw dropping!
Supplies needed
Here’s what you need: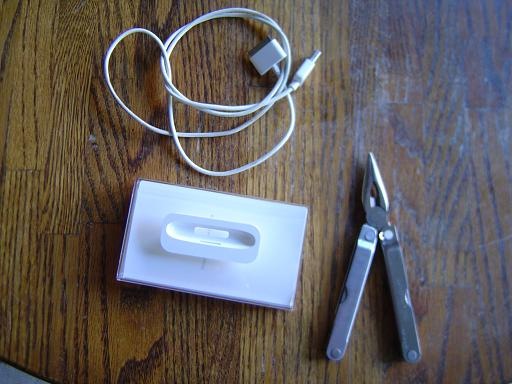
- Leatherman
- Dremel with cutting blade
- Sharpie
- Jewel case used in packing your iPod 2G
- Plastic docking adapter that came with iPod 2G
- Sync cable
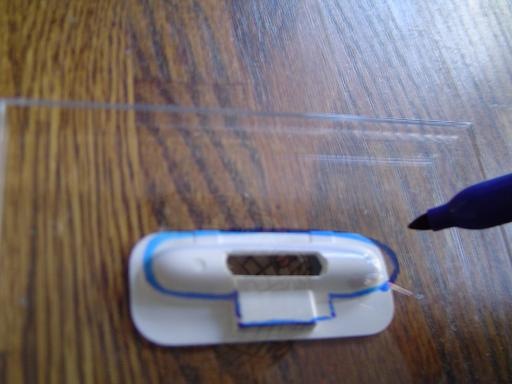
Step 1. Outline the cut pattern on top of jewel case
Center the dock adapter under the TOP of the jewel case. Then outline the INSIDE curves of the adapter. Don’t worry if it’s not perfect, the top of the dock adapter will cover mistakes.
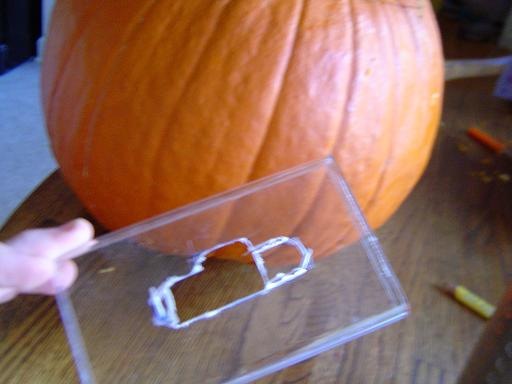
Step 2: Carefully cut out a square with Dremel cutting blade
Take your dremel and cut a square in the plastic. This makes the rest of the cutting easier. Take your time and make this as accurate as possible. One false move and you’ll put an ugly scratch in your case.

Step 3: Carefully SCORE the rest of pattern with Dremel
With the Dremel blade, simply follow your sharpie pattern. I was able to cut some of the plastic away. But I simply scored the rounded sides so I could finish with my Leatherman. Also notice, I did NOT cut out space for the dock adapter tabs. Later, you’ll be able to hook those in place.
Step 4: File the clear plastic until the dock adapter fits perfectly
This might take some time. Simply file around the edges with your Leatherman until the dock adapter fits.
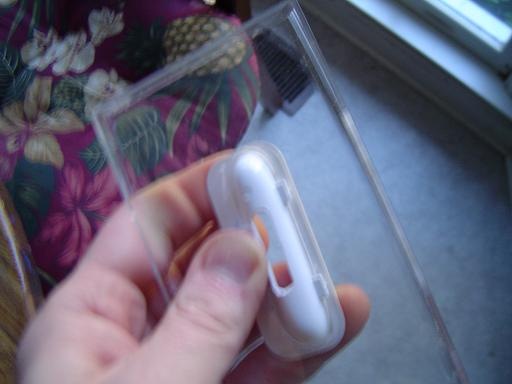
Step 5: File a v-notch into both side of Sync cable
Your sync cable will eventually snap into the dock adapter. In order to do this, you need to cut and file a v-notch into each side of the top attachment near the top. (Double click the pictures to see).
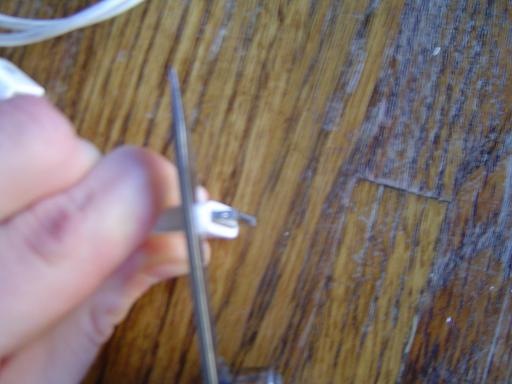

Step 6: File down “hooks” if your cable has them
Older ipod sync cables had hooks in them to keep your iPod attached. If yours is one of these, you’ll need to file down the hooks. Simply hold your Leatherman / file on a table and scrape the top sides of the sync components until the hooks are gone.

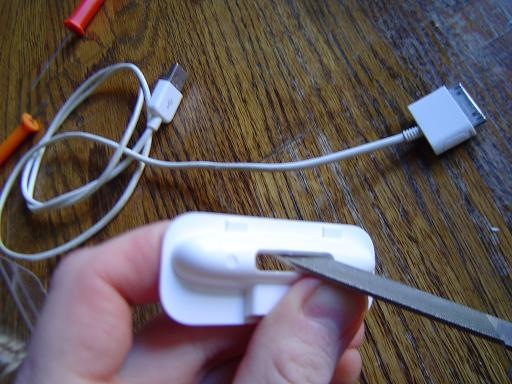
Step 7: File hole in dock adapter so it can fit top of sync cable (keep it snug)
Out of the box, the hole in the dock adapter is not large enough to fit the top of your sync cable. So get to filing. You will need to file all edges of the hole to make it wider and longer. Tip: Frequently insert the sync cable to make sure you aren’t making the hole too big. You want it to just barely fit so it can support the weight of your iPod. Eventually, it will snap into place.
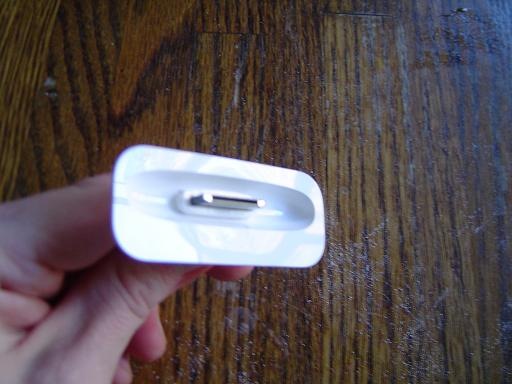
Step 8: Snap top of sync cable into dock adapter
After carefully filing, you see the top of your sync adapter barely fits into the hole. Keep pressure on it until it snaps into place.

Step 9: File notch into bottom of jewel case for sync cable to go to computer
Almost done. File a notch approximately 1/2 inch long one one of the long edges of the bottom of the case. You will probably want it centered but you can go an inch to the left or right if you prefer.

Step 10: Finally, put it all together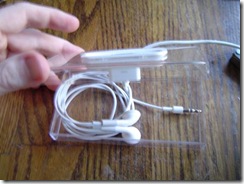

- Insert the dock adapter into the top of the case by hooking the tabs under the clear plastic and pressing it down flush with the top of the case.
- Place the cable over the hole you filed in the bottom of the case
- Close the top of case to the bottom.
- Youre done!
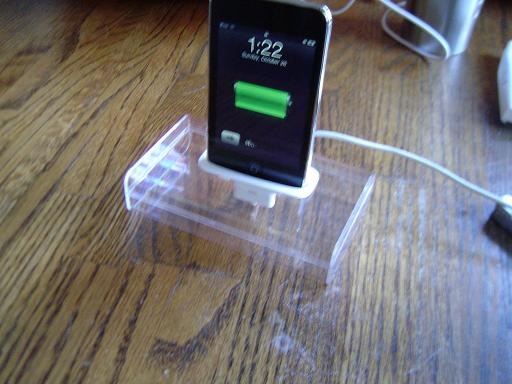
Step 11: Enjoy your new dock! P.S. It doubles as a storage case
Again, this dock looks far better in person than in the pictures. It works great too.
Remember, you can always pack up your earphones, cable, polishing cloth and other small accessories into this dock. You might even choose to put the iPod in it too. But you have to take it apart more.


For more fun projects like this, be sure to subscribe to my RSS feed or my 100% spam free newsletter.
If you like this iPod docking cradle, please share this post with others by submitting it to Digg or StumbleUpon. Thanks!


{ 23 comments }
It is absolutely cool. Where in the world did you get the idea. This is something that you came up with on your own and I wish I had half your creativity.
Damn nice post! i have to make it by myself
Brad,
Awesome little post!
I love your how-to articles. Your bookbinding article started a whole new hobby for me and even spawned a website:
http://www.DIYBookbinding.com
This one almost makes me wish I had an Ipod instead of my little Sansa Fuze.
Andrew Seltz
The Go-To Guy!
Glad you like it. And I had no idea the bookbinding post led to a site. Where is my royalty check? LOL.
Cool tutorial. You have a lot more patience than me my friend.
Ha…check out the name of the site. Persistence is king!
Great post! I followed the post and now have a nice, free, iPod stand. Thanks!
It actually looks surprisingly good, I wont try it myself though – best to stick to what you are good at.
if i wanna use the dock adapter that came with my rebel touch case, do u have any ideas how i can make the sync cable fit to the dock adapter without moving? Because the dock adapter is fully open at the bottom, there isn’t a small opening that is perfect for the sync cable
I’m not sure I understand. Are you talking about the white, somewhat oval piece? If so, is the hole in the plastic too big or too small?
yea I’m talking about the white oval piece, ad the hole in the plastic is too big. (sorry about the confusion)
Oh, if that’s the case, here’s what I’d do… I’d get some epoxy – get the type that works on plastic. Then I’d put the white piece onto a flat piece of plexiglass or plastic (just temporarily.) then I’d use the epoxy to fill in the hole. You might try putting the cable into it first, but it might not line up right. Either way, you would decrease the size of the hole so you can pop in the cable.
its damn amazing i salute your creativity.i am same like you dont want to spend money even dont want another gizmo on my desk.i will surely try this and if i come accross some nice thing i will surely share it with you.thanx.
This is retarded. There is no line out, no s-video, no component, nothing, It’s more of a stand than anything.
this is a really good instruction for a interesting iPod docking cradle!
i’ve been using this for my ipod nano 4g, works great! i now got it in an old box i still had but i’ll find something better soon. the hardest part for me was getting the usb connector to fit in the docking thing, i would’ve liked some more explanation/pictures on that. i also got the newest cable wich has the hooks again, took a while to get those off. thanks for the tips!
my problem now is that i have bought some cheap speakers, but the audio plug is too big. when i put it in my ipod, the sync cable barely fits in when i try hard, so there’s no way i’ll manage to get it in while in the dock. can i convert the plug so i only have to drill a small hole in my dock thing (the white ovale thingy), so it’s smaller and it will fit in the hole?
When I first bought my iPod Touch 2G I thought the case did turn into a dock somehow… I’m thinking about building this dock; however, I cant find a dremel or rotary device that has powerful enough cut-off wheels. What are you using to do that exactly? I bought a really low powered one but im not sure if i should get the more powerful one or something different all together.
Thanks,
Josef, I forgot. I HAD bought some bigger reinforced cut off wheels. You can get them at A harware store or Wal mart or online.
Wow, thanks for the insanly quick reply.
What kind of rotary tool did you use? I’m looking for the brand or maybe just the RPMs. I found a cheap $15 12-volt one at a Habor Frieght and it the cut off wheel seemed to work except it took a long while and the wheel broke. I think i’ll find some better cut off wheels first and if that doesn’t work think about upgrading my dremel to the slightly better one.
Also, thanks a lot for the great guide. Oddly enough I’ll also be getting a RebalTouch case in the mail soon and may use your epoxy advise to secure the cable.
Thanks again,
I think you’ll be ok with your existing dremel. I kept my black and decker rtx on the slowest setting.
I made one myself today and it turned out awesome! Thanks for the great tip!
i tried this before i found this i was trying to saw the case and use razor blade couldnt get it ill try this now
i made this dock too.
it looks realy nice.
it is usefull too.
i say 5 out of 5 stars
{ 3 trackbacks }