Here’s a simple, but great way to bind your own paperback books at home
If you like ebooks but don’t like reading them on your computer screen, this How-to post is for you. I’ll show you a quick and dirty book binding technique you can use to turn your ebook into a real book with about 5 minutes worth of effort. In fact, this is so easy, you might end up self-publishing your own books on demand for profit. If that’s the case, you owe me a copy.
Before we get started, I recommend you subscribe to my RSS feed so you don’t miss out on updates to this guide and other tips.
This process involves just a few basic steps, no sewing, or doing mini-binds (otherwise called signatures). The most time consuming part of this process is just waiting for glue to dry.First, the problem: How many times do you print up a book or detailed report only to lose some of the pages, or have them fall out of your hands and jumble the pages? Since ebooks can contain several hundreds of pages, it’s easy for accidents to happen. You can’t read them if there is any wind blowing. You can’t pull them out 5 minutes before a meeting and turn to your bookmark. Even turning the pages becomes annoying after awhile. That’s why you should consider this easy DIY project.
editor note: Hey, there’s now a full course on quick and easy at-home Bookbinding available!
For the eBook, I purchased the 37signals new ebook Getting Real The Smarter, faster, easier way to build a successful web application. I was watching a show on TV last night and got a bit bored so I chose to bind the book while I was watching. Aside from printing and glue drying, the whole process took about 5 minutes.
So are you ready? Here we go (click on any pictures to get a closer look)…
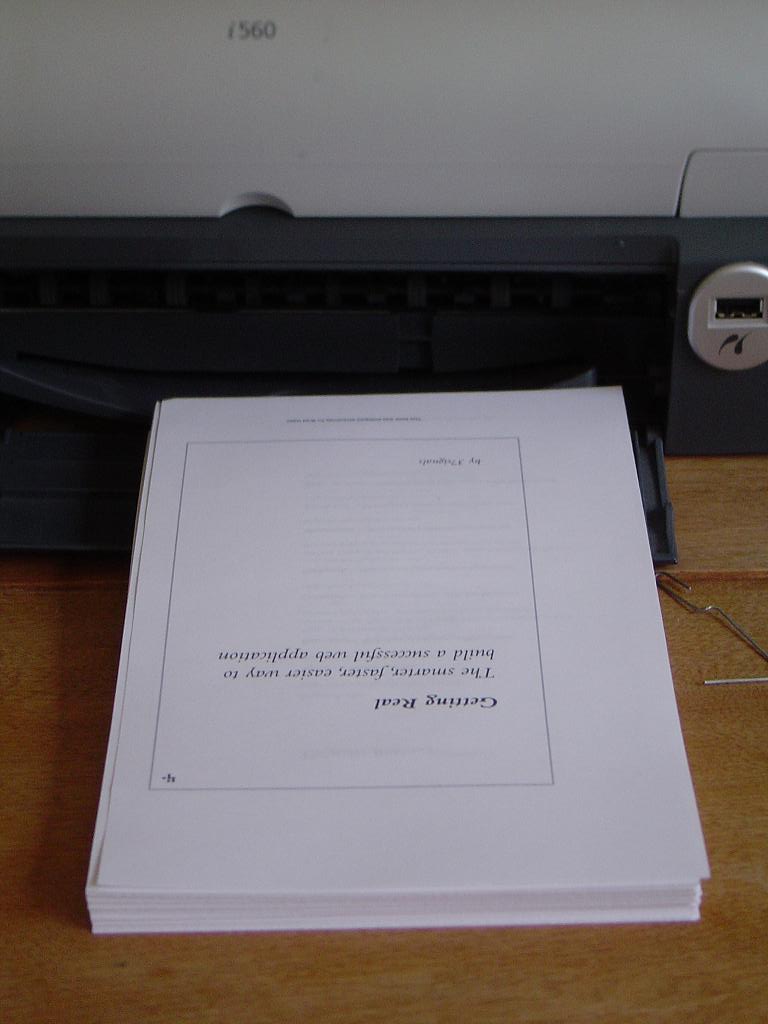 Print the ebook on A4 paper. A duplex printer really helps here. I actually get the full 8 1/2 by 11 sheets and cut them in half. Also, use a heavier 24lbs paper stock to avoid the ink bleeding through.
Like a deck of cards, grab all your book pages and tap them so all the sheets are flat and in line.
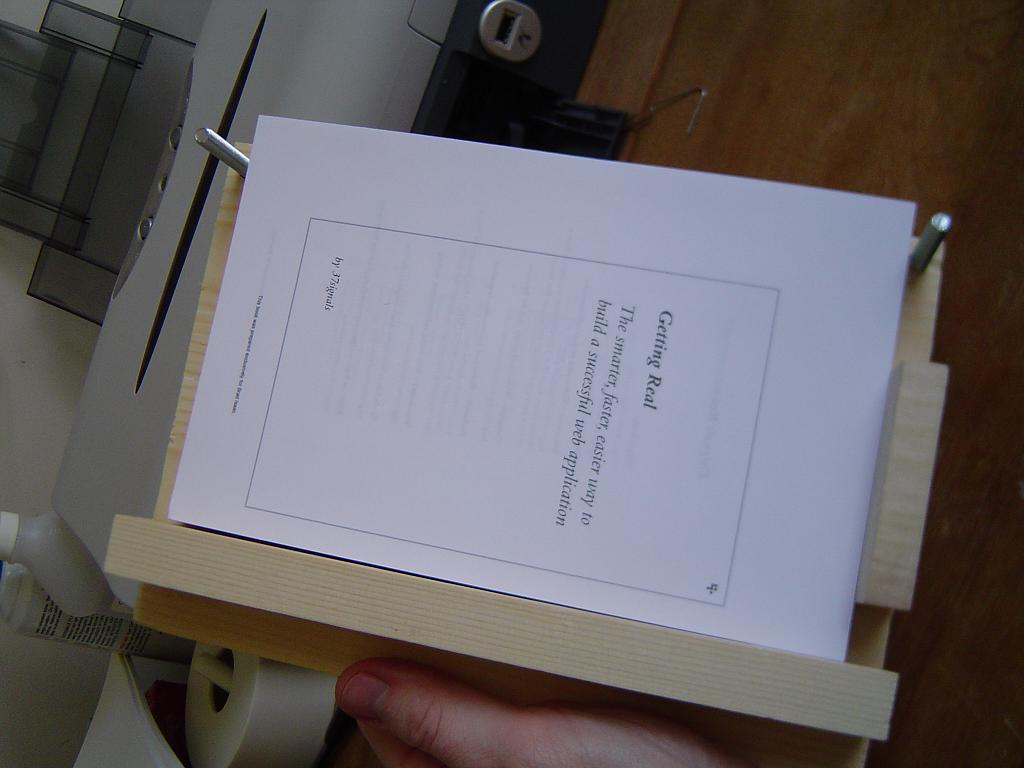 This is a simple book binder I built out of scrap wood. If you don’t feel
like building one, you can use a phone book to hold everything flat and
in line. Building a binder like this definately has it’s advantages.
First the two blocks of wood keep the pages in line on two sides.
Also, it’s very easy to clamp them using the clamp bar and wingnuts.
.
.
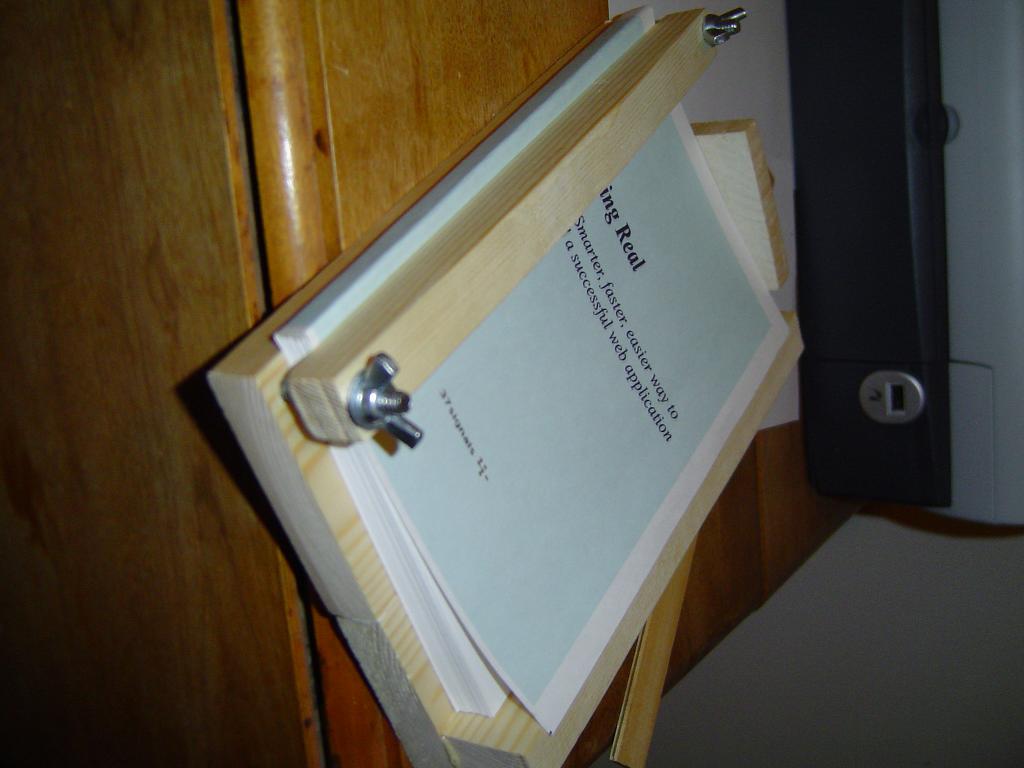
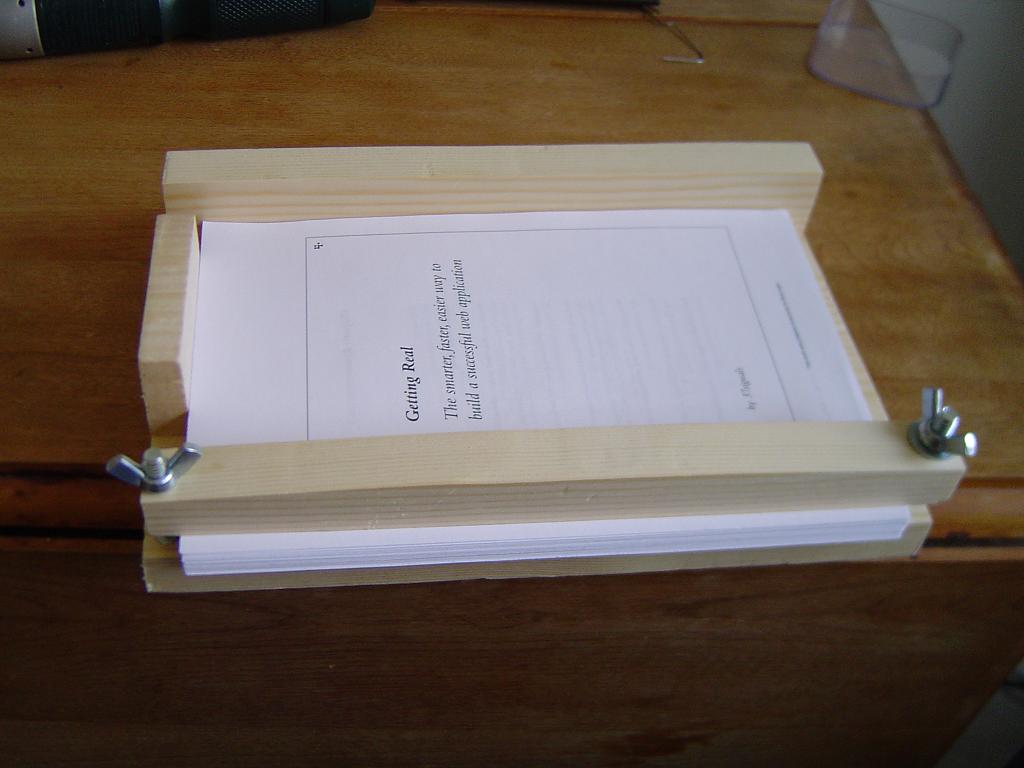 Here are all the pages in the binder, isn’t this pretty? I clamped them tight so nothing moves.
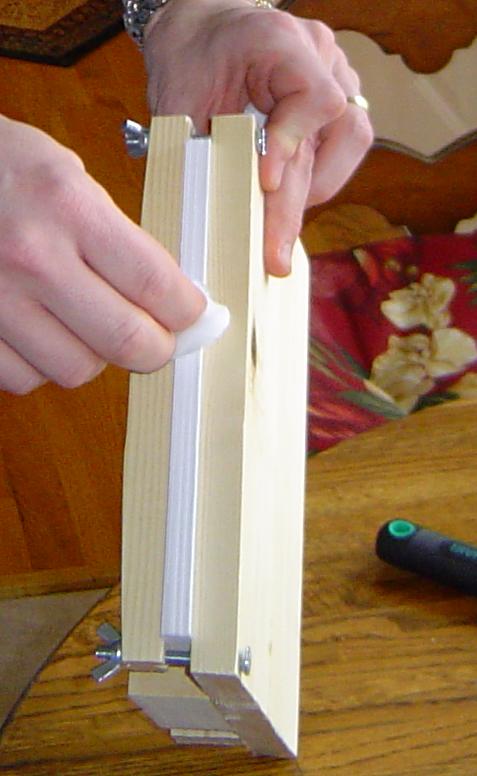 Wet the spine. I use Gorilla Glue
 to bind the books. It’s great for several reasons. One it expands and fills in any unintentional gaps. Two it holds firm and tight. Part of me wonders if pro binders use it because it’s so solid.
I use a cotton ball slightly wet with water to wet the spine. I make sure I make a pass or two over the spine so it’s damp.
Then I squeeze all the water out of the cotton ball and use it to apply the glue.
 While the glue is drying, I measure out the cover. Typically, I use some heavy card stock in legal size. Since I’ve done this so many times, I have a word template for printing the covers. If people want it, I’ll post.
It’s smart to go ahead and fold the edges of the cover before binding so it will fold over the pages without you having to strain. If you are going with pages 5 1/2 inches wide, then measure 5 1/2 inches and make a light mark on the cover. Then measure the width of the newly bound pages and mark there (In this case the page measure 1/2 inch.) Use a ruler to make the folds.
After the glue has dried, I loosen the wingnuts and insert the cover (back side) underneath the newly bound pages.
 After applying a touch more water and spreading glue to the spine, I fold over the cover and make everything tight. Then clamp it in the book binder.
You can see an overlap in the cover. I tend to cut too large so I can cut back..it’s better to have too much than too little. Now just leave everything to dry – overnight is preferable.
.
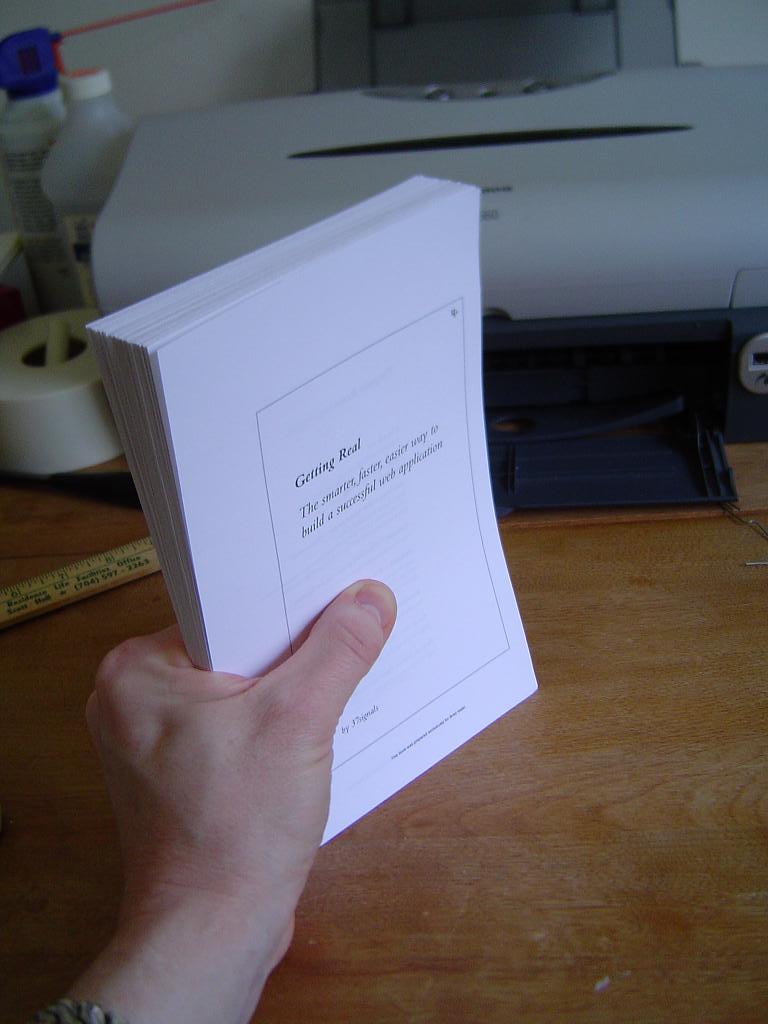
 Ok, it may look like I’m ready to sit down and read you a story…but I am demonstrating the toughness of the binding.
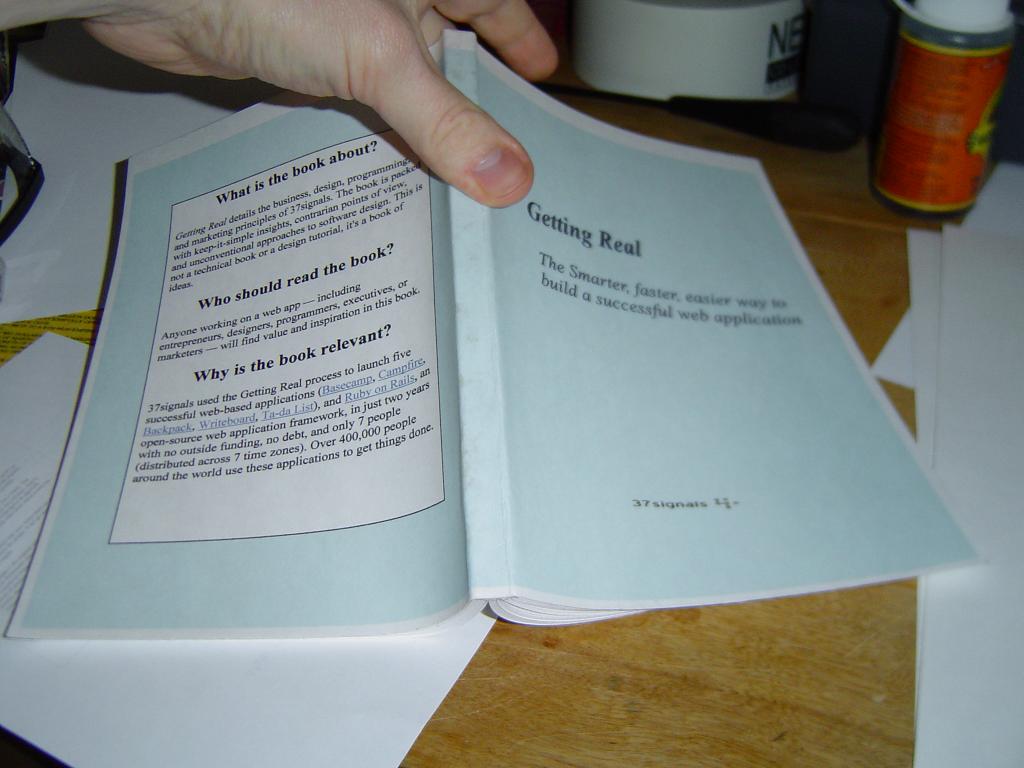 In this picture, I am really stressing the spine and binding. It still holds up and springs back into shape.
When I’ve told people I like to bind an occasional book, they often
remark that it must take a long time or be difficult. The benefit of
this method though is it really doesn’t take that much longer than
printing out the book – which is what most people do anyway. Since you
are printing it, why not go ahead and take the extra step and bind it?
Now that that’s done…I’m off to read. Be sure and post your questions and comments.
For more information on simple at-home bookbinding, grab the Easy Bookbinding Course by Nathan De Stephano


{ 149 comments }
Next Comments →
What a great post! If you don’t mind, I’m going to spread the love around a few groups – this has a perfect application for …gamers. Yes, RPG’ers. Gaming has taken to PDF’s in a big way (see Drive Thru RPG.com) and I can see this bookbinding as a great way to keep old out of print but beloved games in circulation.
Share away! Everything I post can be shared.
Wow! that drive through rpg brings back memories. I haven’t played one of those games since forever. I may have to buy one to introduce my son to the game concept.
Really great post. I’m looking forward to trying this soon. Does this work OK with 8.5 x 11 inch pages?
Brad,
Great tutorial! I of course envy the people who have the skill, patience (and TIME!) to do a full-on book binding, but that, alas, is something I know I’ll never get around to. THIS, on the other hand, is VERY doable! Thanks!
BTW, you might want to offset alternating pages so as to allow room for the binding margin. Their used to be an easily checked off option so as to do this automatically in Word, but I can’t find it now. Or was that WordPerfect… (hehe or BankStreetWriter?)
Cheers,
Ed T.
Just wondering if you meant A5 rather than A4. Cutting letter-size in half approximates A5. Cool post though. I’m much more likely to do this rather than formal sewing and signatures and whatnot.
Nice binding jig too.
OHHH MY. Just finish my 20th book binding, what a fantastic post. You RPGers are going to love this!!!
“Really great post. I’m looking forward to trying this soon. Does this work OK with 8.5 x 11 inch pages?”
Yeah, it works great with that size. The cover can be tricky though. You may end up having to cut some posterboard to fit. And as far as printing, you need access to a wide printer for the cover
This is a great thing. What do you use to cut the pages? One of those big finger choppers found in most offices?
Gorilla glue is just overpriced polyurethane, so if you have a lot of binding to do, you might find it cheaper in the paint section of the hardware store.
This is a great thing. What do you use to cut the pages? One of those big finger choppers found in most offices?
Yes, you got it, choppy choppy.
Gorilla glue is just overpriced polyurethane
Are you sure about that? I have done a lot of polyurethaning over the years and have a can of it handy. It’s really nothing like the Gorilla Glue that gets “foamy”. Of course, I’ve never applied it very thick.
OHHH MY. Just finish my 20th book binding…
Nice! Did you build a block binder too or just use some weight?
It would be great if you could post the Word template for printing the book covers!
As a small press author I often grow tired of dealing with publishers. I figured I could distribute, promote and sell my own chapbooks much better. The only hold up was binding. I fon’t like the cheesy stapled bindings most small press publishers use.
I plan to test your method on my next book. Yes you get a sample copy. I also may link to your post in one of one blog entries.
Thanks man, just found your blog on del.icio.us and plan to help spread the word.
This sounds great for business documents as well! I often have software requirements and architecture documents that are hundreds of pages long. I currently bulldog clip them, which isn’t the best way to bind and read a document. I’ll be binding up these docs from now on (and look like the smartest guy in the room no doubt)!
Great advice!
I used to bind many books back 20 years ago. There are some tricks you can use to strengthen the binding. For example after you put the pages to binder, take a metal saw and use it on spine to create 3-5 cuts across all the pages. Then take some thread or thin rope and put it in the cuts, then apply glue as normally. The thread will dramatically strengten the bind.
I’m using labels for printing front and back cover information. I’m forgeting the avery # but they come 2/page and are really cheap on ebay…great post. Going to try the threads thingy…
Hmmm, I wonder if I could use this method to make a lower-cost moleskine-esque pocket notebook (with customized paper)?
Moleskines typically are sewn pages.
But yes, you could easily use this to create a small pocket journal. My daughter asked me to bind her one for doodling, etc. I planned on doing it over the weekend. I am just trying to decide on what type of cover to use.
I am thinking if I can find some of the packaging for her dolls, I might have enough cardboard to do a doll cover.
Hi!
Your idea is brilliant, I am spending loads of money in copy shops right now for binding copies.
My only problem is: What (European, better in Germany available) glue to use, and how to get the right format for the cover (Europe uses the ISO standard for paper sheet size). Do you have any idea?
Help, I’m all jazzed about binding my own books, but since I’m such a novice at this please define what A4 and A5 paper is. Are you talking size/dimension of paper to be printed on.
Jack
I just cut a normal 8 1/2 by 11 size sheet of paper in half…while printing I use the A4 setting in the printer.
This is fantasic! I used your basic idea to create a glue-top notepad. Instead of Gorilla Glue I found this stuff called Plasti Dip at the hardware store. Dries to about right consistency for pages to tear of easily. Thanks!
http://joshua.herzig-marx.com/?p=107
For all those that are asking how well it works with 8.5 x 11, it works fine. My daughter and I built the form this weekend and have bound 4 books with it already ranging in size from 60 pages to 300 pages. We accidentally bound the first one backwards so we used that as a test case to check the strength of the binding, it’s not going anywhere, this is awesome! 8.5×11 books are a bit unwieldy, but the method works perfectly.
Josh – I’ve used plasti-dip before. Great idea on the easily torn off pages. Might have to try it.
Jeff – Glad to hear it’s working so well for you.
Thank-you so much, mate! I’ve been racking my brain for months on how to do this for myself. I have stacks of old “out of print” books in pdf format that deserve to sit on a bookshelf but had no idea how to go about it. I’m just amazed how quick and easy it is. Much appreciated.
Glad you liked it. Hope you’ll tell your friends about my blog here.
This tutorial is great. I’m about to make my clamp as soon as I get my clothes in the dryer. I was wondering if you could post your cover template, that would be awesome. Thanks.
My father sent me a link to this page knowing that I with to be a published author (though just being able to see my stories in print is enough for me for now) and I must say that this really was a wonderful project to do. I’ve made my own book press and find myself binding not only my works but other things I wish to read away from my computer too. Thank you so much for sharing this wonderful project.
I’m another brick in the “please-post-the-word-template” wall. That would be great! Thanks for the great article!
Yes, please post the word template to me too.
I just want to try the book binding because I spend WAY too much time on the internet. Sooo unhealthy!
I think there’s something so natural about having a book in your hand to read.
Thank you thank you!
Uh Oh! Clicking on your photo’s for a closer look, doesn’t work.
Dee…we just moved this blog so some of the image expansion effects are broken. I think I need to move them all in one fell swoop…very time consuming, but worthwhile in the long run.
Also, I’m sorry about the cover template but it was lost when my computer got a virus in the spring.
Does anyone else have a cover template I could post?
That is actually really cool!
That method is so much simpler that some of the methods I have seen before that involve sewing the pages together.
Thanks for sharing!
First off all great post!
I see you are having trouble with the images because if digg.
Here is a good place to upload and hotlink then with the bb/html code you get, they can handle the traffic.
http://www.yourep.com
Great post. Thanks!
None of the pics come up, probably because you got digged. Does the paper stick out from the clamp a little? If not, what keeps wood from sticking to paper?
Thanks!
This post sure comes in handy. nobody likes reading off their computer screen.
p/s: have trouble viewing your full sized image
Great post but when the image is clicked it is saying “Image not Available”.
Tom,
Yes, the paper juts out of the binder just a 1/4 inch or so.
Sorry about the image resizing I’ll see if I can fix it.
I’ve heard that gorilla glue is highly toxic — any alternatives to be recommended?
I’ve heard that gorilla glue is highly toxic – any alternatives to be recommended?
It doesn’t give off any fumes. And It’s toxic if you eat it while it’s still wet, the manufacturer claims it’s 100% non-toxic when dry. As I understand it, animals are more susceptable to problems because they’ll eat it if given a chance. Once a dog eats it, it expands in the stomach making for a big glue ball – that’s the story anyway. So if you can keep it out of reach of pets and children you should be ok.
If it’s really a concern for you, you might try using some standard wood glue. I’ve used it but I prefer gorilla glue because it bubbles up and reinforces the spine.
Any links or anything on how I might go about making thta jig you have? I guess I could wait for the bigger pics to have a closer look.
It really helps.
and, funny!
I briefly worked at a mainframe computer services company back in the late ’70s. These guys rented time on their computer to a bunch of small companies – back when only big companies could afford a whole computer. Anyway, they would bind the output of some jobs just about the same way. The only differences were that they would apply glue to the moistened pages, then lay a strip of gauze across the wet glue, then brush a little more glue on top. Then they’d cure the glue under a heater, which was one long rod-shaped heating element surrounded by a reflector. Heating the glue let them finish a bind in about an hour. I think they used something like Elmer’s glue. It dried somewhat flexible.
Bigger pictures are not available. Would like to see them for a better understanding. Thanks.
Sweet perfect binding tutorial. You can use regular old elmers to glue your spine. I use another acid free variety os VA but it works very well. I worry about how stiff the grilla glue is after it ries- does it remain flexible? Your jg/book press is nice as well, how about some close up of it so those of us who want can copy it?
hahah that is a GREAT idea! I have a friend who works in construction and says nothing but GREAT things about gorilla glue. Cool post man, and congrats on being on the front page of Digg.com.
Ok, all the picture links are working again. enjoy!
Next Comments →
{ 28 trackbacks }